Based on the interest and number of embedded modules currently available, it appears that the OMAP3 CPU from TI will be very popular in the general purpose embedded Linux market. One of the OMAP3 modules available is the Overo from Gumstix. As the company name suggests, this module looks about like a stick of gum, but smaller, as shown in the photo below. The Gumstix module provides a lot of functionality in a very small package. It is reasonably priced, and is an excellent way to quickly create a product that has advanced functionality such as a high powered CPU (OMAP3), high speed USB, DSP, 3-D graphics acceleration, etc. For an example of the OMAP3 performance compared to previous generations of ARM processors, see this article.
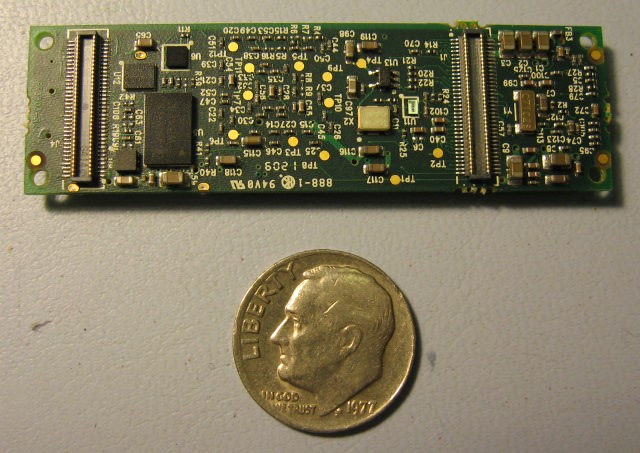
The module contains all the core components, and can then be attached to a custom baseboard using the two high density connectors shown in the above photo. There are 70 signals on each of the two connectors. BEC provides a spreadsheet of the Overo signals to assist in designing a custom baseboard.
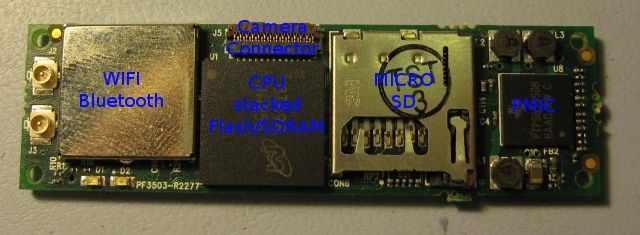
Due to the high level of component integration, the Overo has very few components on the module. As shown in the below photo, there are really only 3 major visible components. The flash and RAM is stacked on top of the CPU. The PMIC contains all the required power managment circuitry, as well as Audio and USB interfacing functionality.
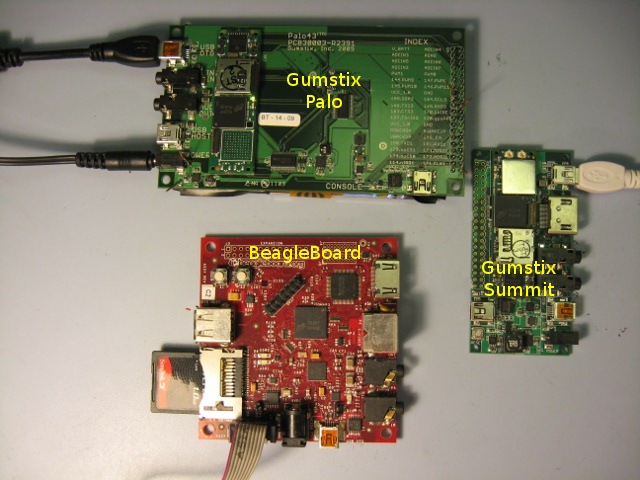
The Overo module must be used with a baseboard. Gumstix provides several development baseboards. For production, a custom baseboard is typically created. The Gumstix baseboards are reasonable cost, so they could be used for prototyping or low volume production if they have the required functionality. Below is a photo of the Summit baseboard that provides DVI video out, audio, USB host and OTG, and an expansion connector with a number of signals.
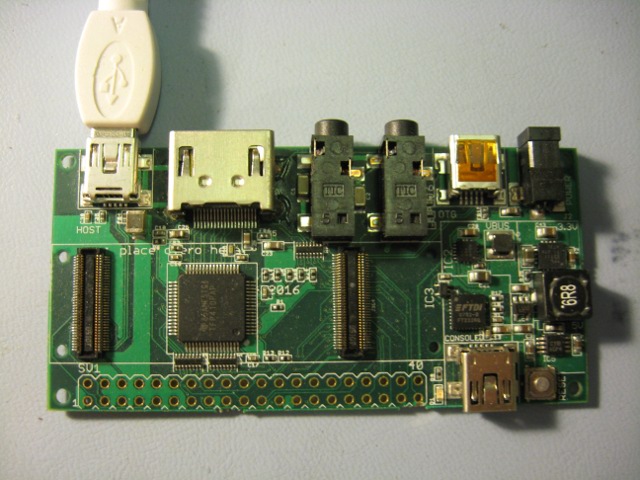
Below is the Palo baseboard from Gumstix that can be used to interface with a LCD display. The Palo board contains a resistive touch screen controller, and circuitry required to interface with a LCD.
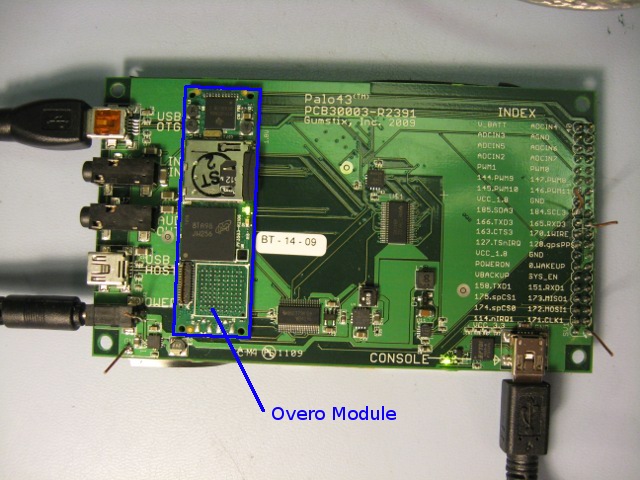
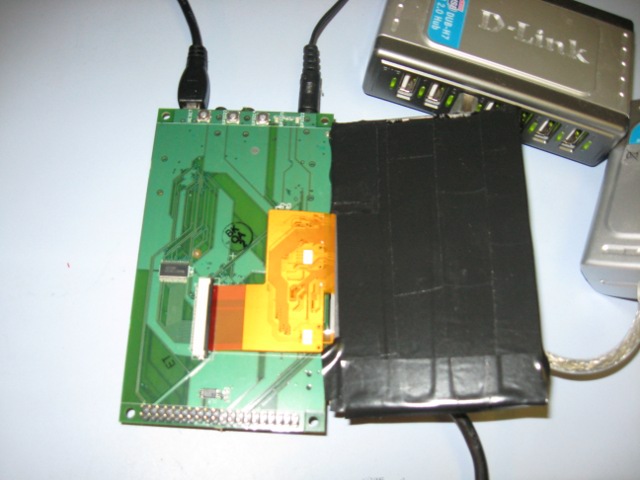
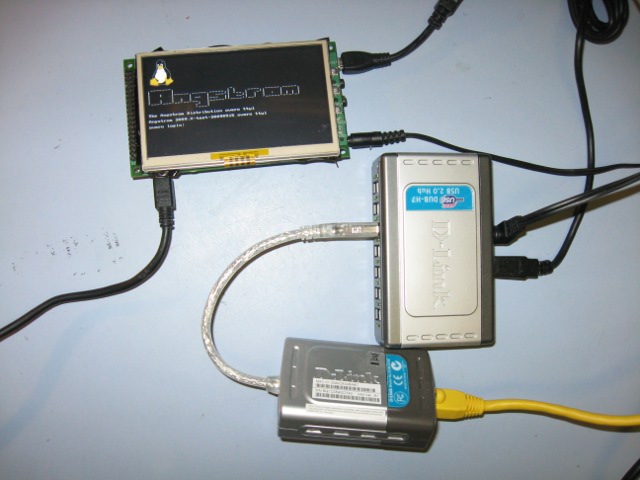
The Overo does not include an Ethernet controller, so you typically use a USB-Ethernet adapter for development. Below shows a typical development setup.
One of the things about the OMAP3 that makes it very attractive for embedded development is the amount of software support, and the number of development and production solutions available. The OMAP3 is very well supported by the OpenEmbedded project, and TI is very active in making contributions to various open source projects. This greatly increases the quality and availability of advanced software functionality needed to support a complex system like the OMAP3.
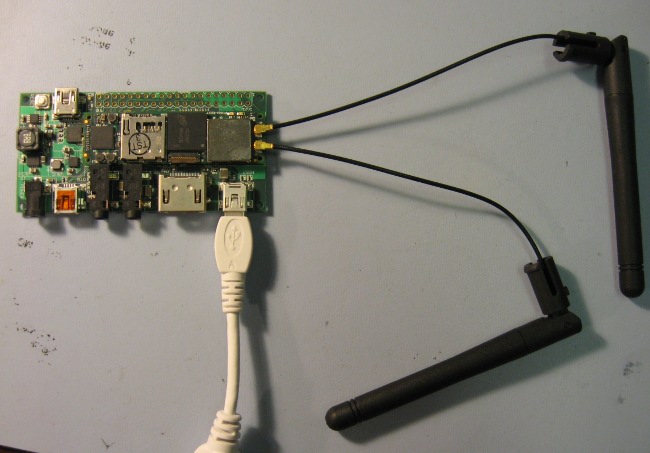
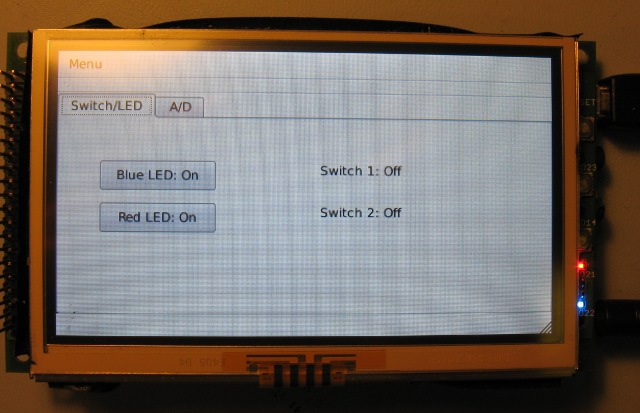
There are many options for software development with the OMAP3 systems. Below is a photo of a very simple Qt application. GTK+ and Enlightenment are other popular GUI toolkits. With 256MB of both flash and RAM, this is more than enough memory for most embedded applications, and provides plenty of headroom for adding features for future product revisions. The Overo has the CPU processing capability to run advanced GUI applications with 3-D affects, as well as advanced web application frameworks like web2py that previous generations of ARM CPUs could not effectively run.
The Gumstix Overo provides an excellent value for developing advanced products. Especially for low volume products, when you compare the effort and time required to develop a full custom OMAP3 solution versus a simple Overo baseboard, using a module can provide significant advantages in terms of time to market, and development cost.
Hello
Your qt led and AD application is very interesting
could you share me this code
regards
Yes, the Qt demo application for the Overo/Palo board can be obtained here: http://svn.bec-systems.com/pub/qt-overo-palo-gpio/
hello
I have 2 questions
1. How do u cross compile Qt code on a x86 for the gumstix overo?
2. Has anybody integrated a projected capacitive touch screen to the overo fire module along with the chestnut board?
Hello,
I am working with the Overo fire with the chestnut board and the LCD touchscreen. I have developed a very small application with QT (a remote UI), and I would to execute my application on the overo. I have been read many tuto and there are some points where I don’t understand.
I have followed the tuto http://gumstix.net/wiki/index.php?title=Qtopia_core_howto, I am download a most recent qt-opensource version (4.6.3). And after, I don’t understand. Furthermore, I am a novice in Linux… 🙂
I working with a virtual distribution Debian on Mac osx. I have downloaded OE, and bitbake like it’s write on the Gumstix site.
Sorry, I am french and I am very bad in english 🙂 But I need HELP !!!!
Best regards
Valentin
Hello, regarding compiling Qt, the OpenEmbedded project already has support for compiling Qt, and that is probably the easiest way. Using the BEC build template, you could do something like:
git clone git://git.bec-systems.com/oe-build
cd oe-build
make setup-gumstix
source setup-env
bitbake bec-qt-embedded-image
After some number of hours you will have images located in: build/angstrom-2008.1/tmp/deploy/glibc/images/overo/ install on your Overo, and you should have Qt.
I’ll try to post some tutorials in the coming weeks on how to cross compile Qt apps with OpenEmbedded.
There are a several recent tutorials that may also be helpful:
http://bec-systems.com/site/637/oe-build-template
http://bec-systems.com/site/668/creating-a-custom-openembedded-image
http://bec-systems.com/site/687/installing-omap3-images-on-a-sd-card
Good morning. I am working with the OveroCom Water, I try to connect two OveroCom to work in parallel. But I just see that the access to the main memory the other system only can be made since the processor.
That is true?.
Is there other form to access?.
Can I access to the main memoria of the processor 1 (P1) since the processor 2 (P2) directly?
Thanks.
The Overo has a 16-bit asynchronous bus on its connectors. I don’t know of any way offhand to directly access the memory of a 2nd module, but you could put a fifo between them or something to buffer the data. The Overo Statecoach (connects 7 Overos) connects a network chip to each module and then communicates over the network interface.
Good morning. I’m working with Overo Water COM and Tobi expansion board. I have a linux O.S working. Now I have developed a new expansion board but with other ethernet controller. I cross-compiled the new ethernet driver and made a new Linux imagen. The question is:
Is necessary to change the U-boot too?
Thanks.
Generally, U-boot changes are required if you need to change the alternate functions of any of the GPIOs. Otherwise, you can do most other things in the kernel.
Good morning. I’m working with Overo Water Com and Tobi expansion board. Where can I found a example to use the GPIO ports?. Thanks
You can do something like:
To export a GPIO:
echo 123 > /sys/class/gpio/export
To read the value:
cat /sys/class/gpio/gpio123/value
To set the value:
echo 1 > cat /sys/class/gpio/gpio123/value
Greeting,
I am working on my overo fire + chesnut43. I connected ds1338 rtc chip to overo. when i do command:
$ i2cdetect -y -r 3
0 1 2 3 4 5 6 7 8 9 a b c d e f
00: — — — — — — — — — — — — —
10: — — — — — — — — — — — — — — — —
20: — — — — — — — — — — — — — — — —
30: — — — — — — — — — — — — — — — —
40: — — — — — — — — — — — — — — — —
50: 50 — — — — — — — — — — — — — — —
60: — — — — — — — — 68 — — — — — — —
70: — — — — — — — —
root@overo:~#
the 0x68 is the address of ds1338 chip.
i can use ‘i2cset’ command to set adjust the time and date. after i reboot gumstix, the time and date is still correct.
When i use ‘hwclock’
Hello.
How can I developed a C code for gpio contol?
Is there a example done?
Thanks.
Yes, here is an example:
http://cgit.bec-systems.com/cgit.cgi/qt-overo-palo-gpio/tree/src/gpio.cpp
Hello, thanks for help me.
I am used the open function
(fd= open(“/sys/class/gpio/export”, O_RDWR);
to read the sys/class/gpio file. But i have the next error:
open(“/sys/class/gpio/”): Permission denied
I work how root user.
What can I do?
THANKS.
Good morning. I’m using the “echo” and “cat” functions to read and write on each GPIO, but now, I wish read or write on a group of pins, for example write the value “001” on gpio0, gpio1, gpio2 in the same instruction.
what can I do?
thanks.
u can send the values to the pins using the same codes .
but if u want to send the values to more than one pin u can do somethinglike this:
u can write a shell script
devmem2 0x480025xx 0x10 to change the register of the gpio so that the gpiois a normal gpio (mod 4)
echo 0 > export…. this is user mod exporting
cd /sys/class/gpio
cd gpio0
echo 0 > value
cd
devmem2 0x48xxxxx 0x10
echo 1 > export
cd /sys/class/gpio/gpio1
echo 0 > value
cd
do the same thing to the third one
……
Hello. I wish to know the function the following pins.
SYSEN
WAKEUP
POWERON
VBACKUP
Thanks.
Hello,
I would like to know if the omap3550 (gumstix) has a high resolution timer.I’ve already looked in the datasheet.But I found nothing. do you have any idea ?
thanks
Comments are closed.